Tuesday 27 January 2015

Blackcurrant ice cream topping

We've had blackcurrant bushes growing in the garden at the farm for as long as I can remember. As children we were regularly given berry picking chores. The bushes themselves are very easy to grow and have a long season. My late Grandmother used to make this fruit sauce all the time during summer. She always had vanilla ice cream in the freezer and this fruit sauce only takes minutes to make; a super simple and delicious dessert. This recipe makes enough to serve 6 people with some left over for your morning cereal. 

Blackcurrant ice cream topping

3 1/2 cups blackcurrants - fresh or frozen
1 cup water
1/2 cup sugar
3 tablespoons cornflour
1/4 cup cold water

Wash the blackcurrants, especially if the weather has been dry as they can get quite dusty. You can use frozen if the season has finished. 

Place the currants into a pot with the water and bring up to a simmer. 


Cook for 10 minutes before adding the sugar. Once added, stir until the sugar is dissolved. 

Taste and add more sugar if required. 

Stir the cornflour into the 1/4 cup of cold water. Add to the blackcurrant mixture, stirring constantly until the mixture thickens. 


Cook for a further few minutes, then set aside to cool before transferring to a suitable serving jug. 


It is best served warm over ice cream. Store any left over in a covered container in the fridge.

Happy cooking xx

Wednesday 21 January 2015

Anzac Inspired Slice Recipe

I made this slice for our neighbour as a thank you for kindly lending us his trailer after our big garden tidy-up session. Given he and his house mates are all hungry young tradies, I thought a hearty mixture of tradition and healthy oats and nuts would be an appropriate combination. So I adapted a traditional Anzac biscuit recipe to enhanced its nutritional value by substituting oil for butter and adding extra oats, along with walnuts and pumpkin seeds.

Anzac Slice

1 cup rolled oats
1/2 cup plain flour
3/4 cup brown sugar
1 cup walnuts
1 cup pumpkin seeds
1/3 cup oil
1 tablespoon golden syrup
2 tablespoons boiling water
1/2 teaspoon baking soda

Preheat the oven to 160deg. C and line a 30 x 20cm or equivalent slice tin.

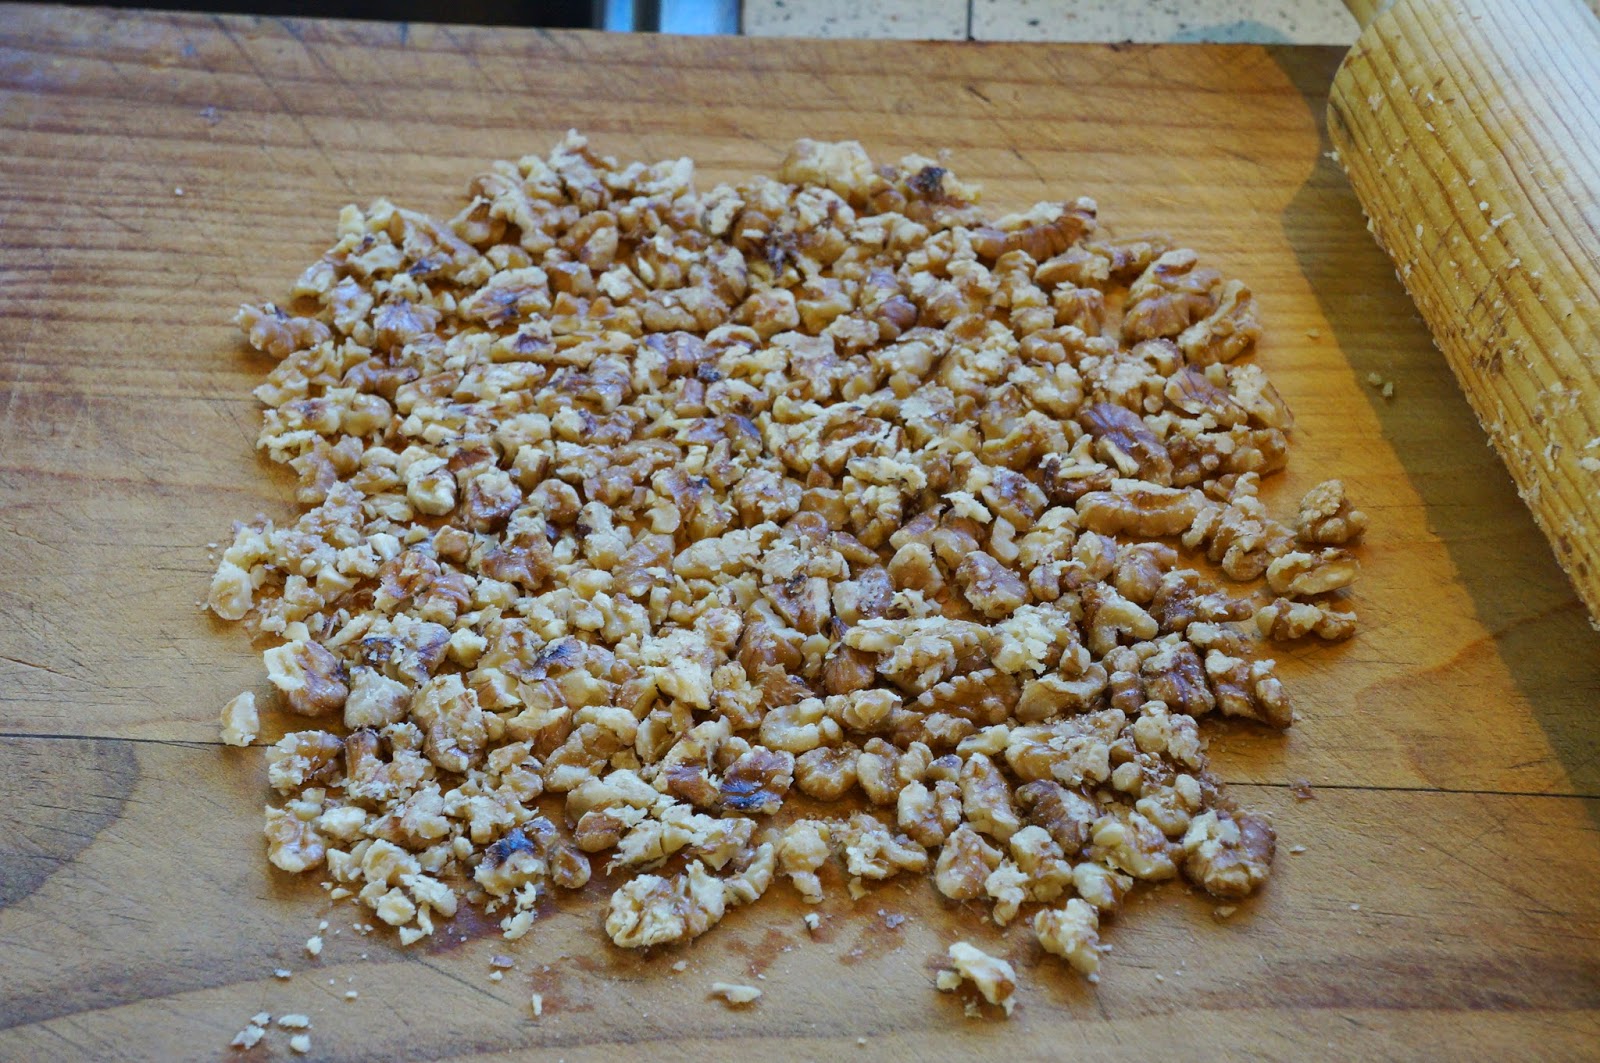
Use a rolling tin to roll over and break the walnuts into small pieces.

This is a more efficient way then slicing, and just as effective.


In a large bowl mix the rolled oats, flour, brown sugar, walnuts and pumpkin seeds.


In a measuring jug mix the oil and golden syrup. Microwave for 20 seconds to warm.

Mix the boiling water and baking soda together in a separate bowl. Add the soda and water to the oil mixture and stir to combine. It will start to froth.

Mix the liquid ingredients into the dry ingredients and stir to combine.


Spread the mixture into the slice tin and smooth over the top.


Bake for 20 to 25 minutes until golden and risen.

Leave in the tin to cool and harden for 15 minutes before using a serrated knife to slice into squares. This is best done when the slice is still warm.


Now that the school term is about to start, this slice also makes a great lunchbox filler.

Monday 19 January 2015

Make a Cute Little Handmade Charm Bracelet

Here is a cute little idea for a simple cloth and ribbon 'charm bracelet' that the little girls in your life will love. All that's needed is a scrap of fabric, matching organza ribbon and an assortment of charms and buttons. 

It takes very little time to complete, so is a perfect little gift. I made two of the bands, so I could keep one spare for up coming birthdays.

Start by cutting out the 14.5cm x 11.5cm main band piece. The size of the band can be varied. Measure and cut a 50cm length of 4cm wide organza ribbon. These measurements allow for 1.5cm seams. 


With the right sides of the fabric together, sew the strip together along the long edge using a 1.5cm seam. 

Turn the strip in the right way and position the seam in the centre of the back of the strip - as shown on the bottom panel in the photo. 


Tuck the raw edges in at each end and pin as shown in the photos.

Take the organza ribbon and fold the raw ends over twice.
Using a zig-zag stitch sew across the ends to prevent them from fraying.


Match the centre point of the organza with
the centre point of the fabric band and pin into place. Pin the remainder of the band and ribbon together.
Using matching thread, top stitch the ribbon to the fabric band. 


Now assemble your collection of charms, button and beads, arrange them onto the band in whatever pattern you might like, then hand sew them into place. 


The ribbon ties around any size wrist making it a perfect gift. Our little blossom was very happy to choose the selection of bits and pieces she would like sewn onto her charm bracelet. She chose the colours too. No surprises with the pink and blue ribbon combo! 

Happy sewing xx

Thursday 15 January 2015

Making Melting Moments


Melting moments are such an old time favourite. Too often the ones in cafes are so big they are more like melting minutes than melting moments, so I decided to make some cute and dainty ones for us to share with our friends. I got this recipe from the old version of the Edmond's book, hence the imperial measurements. Crumpled and stains, its a standout go-to for just about any old-school recipe you might want. 

Melting Moments

7 ounces butter
3 ounces icing sugar
4 ounces flour
4 ounces cornflour
1/2 teaspoon baking powder

Preheat the oven to 175deg. C. (or 350deg. Fahrenheit in imperial measures)

Cream the butter and sugar until pale and fluffy. 


Sift the dry ingredients together and fold into the butter and sugar until well mixed.


I used a piping bag and round nozzle to pipe the biscuits onto the tray. 


It's way more time effective than rolling them into balls by hand. 

I piped each one to about a 4cm diameter circle. 

The tops will all have a peek; don't worry, just push the peaks down to smooth the top. 


Leave at least 4 or 5 cm between each biscuit as they will spread a little in the oven. 


Bake for 20 minutes. They should not colour, and won't harden until they cool, so be careful to set the timer. 

Once cold fix together with lemon icing. 


Lemon Icing

approximately 1 cup icing sugar
the juice of a lemon

Combine the icing sugar and lemon juice to form a firm icing. Add more icing sugar if the icing is too thin. It will depend on the size of the lemon. 


The icing needs to be firm or it will drip out from between the biscuits.

Happy baking xx


Tuesday 13 January 2015

Make your own cute laptop or tablet bag

With our ageing laptop starting to do the 'overheating thing' and all the seasonal sales, the time was right to trade up to a mobile device. Remember the days when the old laptops seemed so small? Anyway, a smaller, lighter laptop calls for a smaller, lighter bag to carry it around in. Inspired by the reading bags I have made for our daughter and her buddies, I made this variation.


I included a separate flap compartment for the cords and charger: nothing worse them misplacing those. The fabric is from Bolt of Cloth. Love that place. The floral bias binding is from Fabric Vision. This basic guide can be adjusted to fit whatever device you happen to have - any thing from ipad, to laptop, to tablet. 


Use the device as a size guide and make sure to allow at least 4cm extra fabric, plus enough for the flap, around the device. 

For the Surface 3 cover, I allowed 26cm for the short edges and 49cm for the long edges. Cut two matching pieces of the main fabric to this size. 
Cut one of the main pieces into two to form the separate devise and cord pocket flap panels. 

The devise pocket panel measures 26 x 34cm, the cord pocket panel measures 26 x 15cm. 


Use the main pieces as a pattern template to cut out the lining panels. Match them up to their main panels as shown. 

Machine stitch around each panel using a half cm seam to secure the main fabric to the lining. 
Sew the Bias binding onto each of the pocket openings.

Start by pinning the short edge of the bias binding onto the edge of the fabric.  

Sew down the fold, being careful not to stretch the binding.
Once the short edge is sewn, fold the binding over the seam and secure it so the long edge overlaps the first line of stitching. 
That way the 'stitch-in-the-ditch' will catch the wider underside of the bias binding. 
The stitching should be right up against the previously stitched binding, as shown in the picture.  
The right side of the finished binding. 
At this stage it is a good idea to sew on the two sets of velcro strips. 

For the flap pocket, I cut the width of the hook tap in half, as I didn't want to have too much of it around to catch on everything that was being put into the pocket.

Position it inside the pocket panel and top-stitch into place.


The stitching will be visible on the outside of the pocket - as shown in the picture on the right


Pin the flap cord pocket onto the main panel of the bag in order to determine the placement of the opposing fluffy half of the velcro. I left this half in one piece in order to allow plenty of space to fix the velcro together.


Top-stitch it into place as shown. The stitching from this will also be visible on the outside of the bag. It forms part of the fold of the flap.


Place another length of hook velcro onto the outside of the other end of the flap pocket and top stitch it into place. This is the velcro that will secure the pocket bag flap onto the main bag.


Pin both pockets to the main outside panel of the bag and put all the cords and the device into the pockets. 

Fold the flap over to determine where the fluffy velcro should be placed in order to comfortably close the bag.

Pin the velcro strip in place and top-stitch to secure.
Place all the panels together. Overlap the bias binding at the pocket mouths so the flap pocket bias is underneath the main device pocket opening.

Attach the two short ends of the bag together using the bias binding. If you have stripy pattern fabric, now is the time to make sure they match together.
Now use the bias binding to sew up the long edges of the bag.  Leave extra binding at the ends in order to fold them in before the second row of sewing. 
Here is the underside of the tucked in end of the bias ready for the stitch-in-a- ditch to secure it.


The finished underside of the bias binding.


Give the bag a good iron, and away you go. Here is the finished, closed bag complete with its contents. Happy sewing!